Geometrical figures basically consists of lines. Any design, simple or complex, which you create in CorelDRAW, consists of geometric figures that are made by using lines on the Drawing page. Therefore, if your want to create designs in CorelDRAW X5, you need to begin by creating simple geometrical figures and know the tools used to create them. Basic figures include line, rectangle, ellipse, polygon and star. To draw these shapes on the Drawing page, you need to be adept in handling the mouse. In CorelDRAW, there are number of tools that you can use to draw basic shapes. The tools are easy to use in most cases their names suggest their functions, such as Rectangle tool, which is used to draw rectangles, and Ellipse Tool, used to draw ellipse. Apart from this , there is the Freehand tool, in your CorelDRAW document. Let’s begin by learning about the Freehand Tool.
Drawing a Line by Using the Freehand Tool
The Freehand Tool enables you to draw straight and curved lines. You can also use this tool to adjust the smoothness of the lines.
Perform the following steps to draw a line by using the Freehand tool:
1. Select the Freehand Tool from the Toolbox.
2. Click to specify the starting point of the line on the Drawing page
3. Drag the mouse pointer, and click a location on the Drawing Page to specify the endpoint of the line.
As you click, a straight line is created by joining the two points.
Note:
Rotating a line at an angle requires you to move the mouse pointer at the time of specifying the points of the line and then draw the line. Likewise, erasing requires holding the Shift key and then dragging backward. You can also draw a curved line by using the Freehand tool. For this, click the point where you want to start the curve on the Drawing page, and drag the mouse pointer.
Joining Freehand Lines
You can also use the Freehand tool to draw a series of connected lines by using the Freehand tool:
Perform the following steps to draw a series of connected lines by using the freehand tool:
1. Select the Freehand Tool from the Toolbox.
2. Click and drag anywhere on the Drawing page to draw a line. The mouse pointer changes into a cross head pointer shape having a line initiated from the selected started point on the Drawing page.
3. Double-click the point where you want to end the first time. This point will act as the starting point for the second line.
4. Double-click the point where you want to end the second line. This point acts as the starting point for the third line.
5. Double-click the point where you want to end the third line on the Drawing Page. This point acts as the starting point for the fourth line.
6. Click the final point of the last line to finish the line.
A zigzag pattern of connected lines is created.
Note:
A single line can be drawn by selecting initial and final position of the line on the Drawing page. On the other hand, in case if you want a line in continuation. You can draw it by selecting the initial position and continuing by double-clicking to end the first line on the way to give continuation to the proceeding line.
Now, let’s learn to use the Rectangle tool.
DRAWING A RECTANGLE
The Rectangle tool is used to draw rectangles. After drawing the rectangle, you can resize it by using the handles on its boundary or specify its height and width on the Property Bar.
Perform the following steps to draw a rectangle:
1. select the Rectangle Tool from the Toolbox
2. Click and drag the mouse pointer to draw a rectangle on the Drawing page
3. Type some values in the Object Size text boxes on the Property bar to specify the width and height of the rectangle. In our case, we have typed 5.166″ as the width and 3.966″ as the height.
The rectangle is drawn according to the specifications you set in the preceding step. After drawing a rectangle, let’s learn to draw an ellipse.
Drawing An Ellipse
You can draw an ellipse by using the Ellipse tool. After drawing the ellipse, you can change its height and width by either dragging its handles diagonally or by setting its height and width from the Property Bar.
perform the following steps to draw an ellipse:
1. Select the ellipse tool from the Toolbox.
2. Click and drag the mouse pointer to draw an ellipse on the Drawing Page.
3. Type some values in the Object size text boxes on the property bar to specify the width and height of the ellipse. in our case, we have types 6.914″ as the width and 3.705″ as the height.
The ellipse is drawn according to the specifications you set In the Preceding step.
Dawing a Spiral
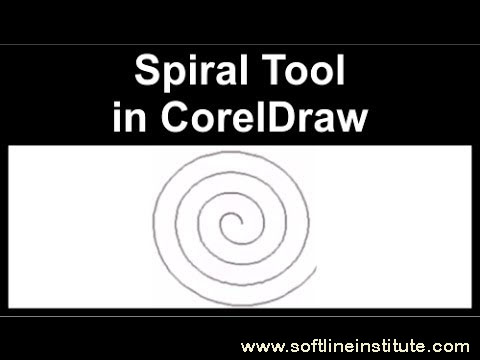
You can draw a spiral by using the Spiral tool. There are two types of spiral shapes in CorelDRAW X5 symmetrical and logarithmic. You can set the number of revolutions of the spiral from the property bar a high value results in an increased number of spirals, whereas a low value reduced number of spirals.
perform the following steps to draw a spiral
1. Select the arrow on the right side of the object tools in the Toolbox. A flyout appears.
2. Select the spiral tool from the flyout.
3. Type a value to specify the number of resolutions for the spiral, in the Spiral Revolutions spin box on the Property bar. In our case, we have retained the default value, which is 4.
4. Click either the Symmetrical Spiral or Logarithmical spiral button on the Property Bar, according to the type of spiral you want to draw. In our case, we have selected the Symmetrical spiral button.
5. Click and drag to draw the spiral on the Drawing page.
FOR MORE INFORMATION